• Taking Listing Photos

    Taking Listing Photos
    When clicked, this video is loaded from YouTube servers. See our Privacy Policy for details.

    How to Take Listing Photos of Your Rental Unit

    Taking high-quality listing photos can be one of the most important things you do when marketing your unit. Prospective tenants want to see a good looking and clean unit and if you have low-quality photos, they’re less likely to want to see it or apply. With today’s DSLR cameras so easily accessible, high-quality photos are fairly easy to get. If you don’t own one, you might consider asking a friend if they can help you or if you can borrow theirs for a day.

    Most everyone has a smartphone as well. While smartphones definitely can’t get the same quality shots as a DSLR, there are still some ways you can improve your listing photos. This is one set of suggestions that you shouldn’t overlook since it affects every online listing. Don’t forget that you can take hundreds of pictures and sort through them later. Also, with practice, your photos will only get better. If you’re interested in learning more about our full property management services (which includes taking listing photos), visit our Services & Pricing page. Below are some tips to get better and higher-quality photos of your vacant rental property. 

    1. Choose a Good Time of Day

    If you have the freedom of choosing the time and day for your photos, remember some of these things. Exterior photos are best when in full light, so if you want to get a great picture of the front of your house, make sure the sun is hitting it just right. If your house faces East, the best time would be the morning. If you have a great looking backyard, make sure it gets the attention it deserves as well. 

    For interior photos, you will want to take them around midday. This will ensure that the maximum amount of sunlight is helping light up the rooms in your rental. If you take interior photos in the morning or afternoon, light will shine through windows and create many shadows that can be difficult to manage. For high-end properties, you might also want to take some “twilight photos” which show a property during sunset. The best time for this is usually the first 20 minutes after the sun sets. 

    2. Turn on All Lights

    By turning on all the interior and exterior lights, you will be able to both add some additional lighting for your photos and show tenants what will be lit up in the dark. By turning on lights, you can feature some of the lighting that you might have – recessed lighting, lighting underneath cabinets in the kitchen, or even your light over your stovetop. Tenants also like to see that things are working, so make sure all the light bulbs are functioning. You don’t want to give the impression that something in your rental doesn’t work. 

    3. Clean Up Messes & Distractions

    Sometimes vendors will leave small traces of dirt or debris after they complete their work, so make sure you have a rag or wipe to quickly clean up any messes. Having your unit professionally cleaned is always important for rental properties, so consider hiring a company to take care of that for you. Hide any distractions throughout the rental – especially if you are taking photos while the unit is occupied. Some things you will want to consider hiding are magnets on the fridge, loose cords, papers, boxes, soap dispensers, and even cars or bikes. You’ll also want to put toilet lids down, open up blinds to let light in, make beds, organize clothes or shoes, and make sure chairs are straight and pushed in. 

    4. Use an External Flash

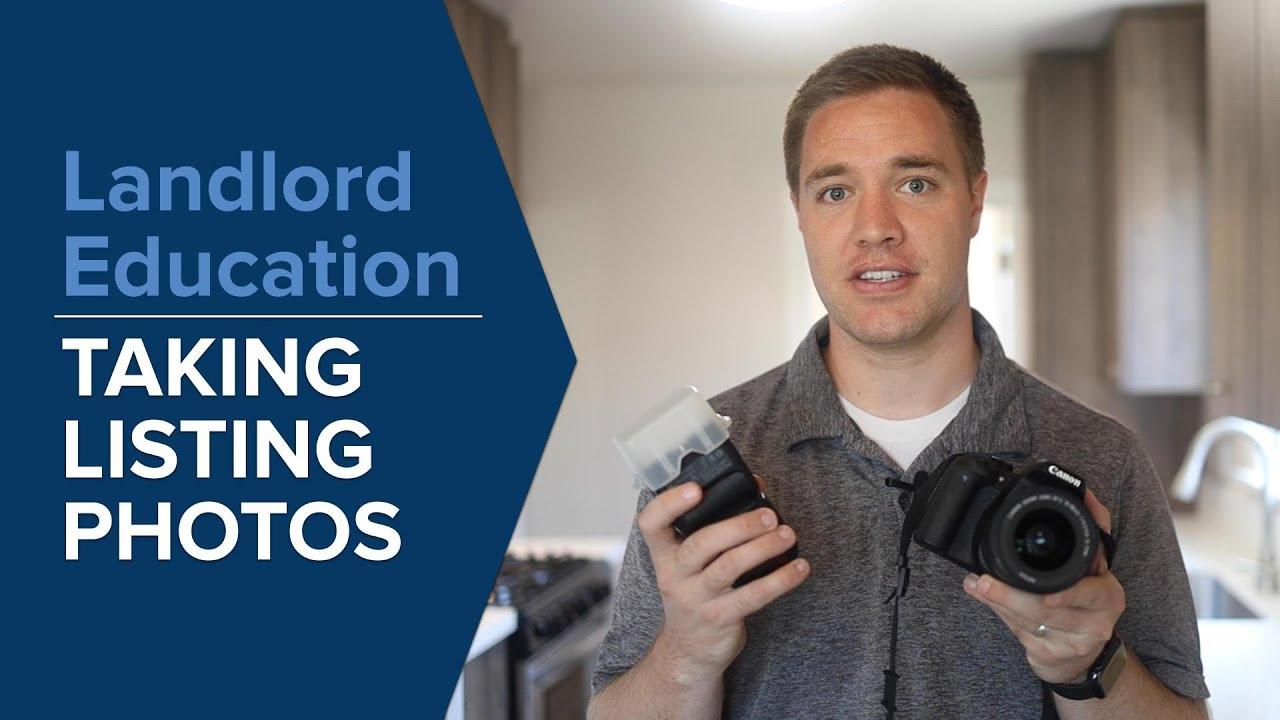
    We always use an external flash for our photos to light up each room and minimize dark areas. When you use an external flash, you need to make sure the flash is pointed toward the ceiling (and forward slightly) so that the light will bounce off and fill the entire room. Diffusers also help to fill the room with as much light as possible without creating harsh shadows. Make sure you watch the video for an example of the difference an external flash can make. Click here to see the type of flash that we use for our DSLR camera setup. 

    5. Use a Wide Angle Lens

    If you have access to a wide-angle lens, make sure you use it! If you take listing photos often as a landlord or property manager, it’s worth investing in a wide-angle lens that will give good results. This is what the professionals use and it can make a big difference for each room in your rental. DSLR lenses are measured in millimeters and the smaller the size, the wider the shot.

    Most standard lenses will be about 18mm, but a good wide-angle lens will be more like 10mm. If you use a lens like this, you can stand in one corner and almost capture all other corners of the room in one shot. Wide-angle lenses also help when photographing small spaces like closets and bathrooms. Make sure you watch the video for an example of the difference a wide-angle lens can make. Click here to see the type of lens that we use for our DSLR camera setup.

    6. Position Your Camera Correctly

    Get into the corner of the room so that you can capture as much of the area as possible. This might sometimes mean that you have to back up into a closet or the shower in your bathroom. Photos should be taken at a little below eye level or midway between the ceiling and floor of a standard height unit. Consider taking your listing photos on a tripod so that they are at a consistent level. When you get into tight spots, you might have to take the camera off the tripod. When you are prepping your shots, try to line up vertical lines with the sides of the picture. That means that if you have walls, cabinets, appliances, or door frames in the photo, make sure they are vertical and lined up properly.

    Positioning the camera lower might help with achieving this effect. Take photos horizontally or in landscape mode as often as possible. Photos online tend to look best horizontally on websites for listing rental properties. Keep this in mind even when you’re using a smartphone. If there are mirrors in a bathroom, bedroom, or on closet doors, try to position yourself to the side or underneath the mirror. Sometimes you can open up a closet door halfway to both show when the inside of the closet looks like and to avoid showing your reflections while taking the picture. 

    7. Using a Smartphone

    If you’re considering taking listing photos using a smartphone, first try and see if you have a friend who might loan you a DSLR camera and lens. We always recommend using a real camera over a phone. If you have to use a smartphone, make sure you’re following the tips above – positioning your phone correctly, trying to maximize the amount of light, cleaning up, and turning on all the lights you can. Some smartphones have wide-angle lenses, so use that if you have that option. You could also buy a wide-angle attachment for your smartphone that creates a wide-angle effect; however, keep in mind that those attachments usually give a fish-eye effect. 

    Ask Uplift Property Management

    As a San Diego property manager, we want to help landlords and owners everywhere. If you are wondering how you are going to take photos of your vacant rental, please contact us. We would love to talk to you about some of these suggestions and others that might help. Taking listing photos is included in our management fee for all our properties. Take advantage of a Free Rental Analysis for your property. Our full property management service includes all this and more. Of course, we also offer lease only services where we can list, market, and show your unit. We also process applications and get a signed lease done. Make sure you keep up your Landlord Education by following Uplift Property Management on Facebook, Instagram, or YouTube. 

    CAMERA GEAR THAT WE USE:

    Even though you can use most any DSLR camera, wide-angle lens, and external flash, here is the equipment that we currently use: 
    Camera Canon t7i DSLR

    Canon EF-S Wide-Angle Lens 10-18mm

    Canon External Flash

  • Managing Maintenance Requests

    Managing Maintenance Requests
    When clicked, this video is loaded from YouTube servers. See our Privacy Policy for details.

    How to Manage Maintenance Requests

    As a landlord, you’ll need to know how to manage maintenance requests from tenants. This skill can be helpful if you are managing your own rental property or if you have a property manager working for you. If you can get maintenance requests processed and addressed quickly, tenants will be happier and likely want to stay in your rental property longer. That can mean less vacancy costs for you and a better investment overall. Even if you feel like you have maintenance under control, take a few short minutes to read through these suggestions so you can refine your own process. Here are a few tips to follow when handling your tenant’s next maintenance request.

    1. Understand the Maintenance Request

    Make sure you fully understand the request. Often, tenants will send a request with only 2-3 words. Here are a few examples of some requests that we get almost on a daily basis:

    • “Garbage disposal”
    • “Kitchen light”
    • “Broken window”
    • “Leak in bathroom”
    • “Toilet”

    We wish we were joking about some of these, but tenants really do submit maintenance requests with these exact words. You will need to make sure you follow up to get all the details. You’ll need to find out the exact location, size of the leak, reason the window was broken, and what they’ve tried already. Requesting photos is a great way to pinpoint the issue and get the tenant to communicate clearly. If there are issues with an appliance, you might also ask for model numbers to expedite repairs. These additional details will help you determine the severity of the request and also who to send. If it’s an emergency, make sure you get on it quickly. 

    2. Troubleshoot with the Tenant

    Taking a few minutes to troubleshoot with the tenant can potentially save you (and them) hours of your time and hundreds of dollars. Tenants will often report things that should be their responsibility. They should be expected to change out light bulbs, batteries on thermostats, or an AC filter when needed. Don’t miss the opportunity to educate your tenants about what is expected of them and what they’re responsible for. Don’t be afraid to ask the tenant questions for clarification and DO NOT assume the tenant already tried the “obvious” solutions.

    Every now and then a tenant might respond with “of course I tried that!”, but more often you will find that they haven’t tried much of anything. We’ve created some videos that give maintenance tips for tenants. We encourage you to send those to your tenants so they can know exactly how they can fix minor problems themselves. You will also want to make sure tenants understand when you won’t be sending anyone for the issue at the moment. 

    Click here for Tenant Maintenance Tips videos

    3. Find a Reliable Vendor

    If you’re not able to successfully troubleshoot the issue, that means you will need to call a professional. Make sure you choose a vendor that’s licensed and insured. That will mean that if anything goes wrong on the job, the vendor will be able to make it right. You’ll need to make sure that you clearly communicate what you need done and give the vendor a max maintenance limit for the cost of the job. Using the right vendor can actually be more difficult than it sounds. If you watch our Working with Vendors video, it outlines some of the things we suggest to keep in mind while working with vendors. Even if you’ve been managing your property for a long time, these suggestions will likely still be valuable. 

    Click here for the Working with Vendors video

    4. Notify the Tenant

    Don’t forget to notify the tenant when there’s an update. It’s their home and they really appreciate being kept in the loop when possible. Normally we have vendors directly communicate with tenants to avoid any “middle-man” issues, but you will still need to contact your tenant periodically. Acknowledge their request when you receive it. Also, let them know when you contact a vendor and send out a work order to them. Sometimes if you are updating tenants, you will find that the maintenance issue has resolved itself and the tenant just forgot to let you know. If you’re communicating regularly. You could avoid having to pay (or charge the tenant) for a service call when it was unnecessary.

    If you are stuck as the middle-man scheduling the appointment, make sure the tenant knows when the vendor is scheduled to come. Also, make sure the tenant knows that they’ll get charged if they don’t keep the appointment. If you have to serve a 24 hour notice of entry for your vendor, make sure you are communicating that in writing to your tenant. You also want to notify tenants when they could potentially be charged for something that they may have caused. This could include unclogging drains with things like food/hair/toys, repairing broken windows caused by the tenant, or service calls from vendors when they find no problems with the unit. This communication can often be tricky and time consuming, so let us know if you have any questions about this.  

    5. Verify Completion

    Verify completion of the work with the tenant. Once the work has been done, check with the tenant to make sure it was done completely and everything is working properly. You can even ask the tenant for feedback on the vendor you sent out. This will show the tenant that you are still wanting to communicate with them and that you value them as a resident in your property. The tenant will also be the first person to know if anything goes wrong with the repairs made.

    Sometimes you might have a plumber visit your unit and cut out a section of your wall or ceiling to access a pipe or leak. Plumbers won’t repair the wall, so they will leave it (hopefully clean) for you to take care of. Sometimes they won’t tell you the status of the unit when they leave though. So checking in with the tenant soon after the repair will let you know what still needs attention and how things need to be handled moving forward. 

    6. Keep a Written Record

    Keep a written record of everything you can. From start to finish, you want to keep a record of all communication and requests. Encourage tenants to submit all maintenance requests in writing – via email, text, or physical letter. When you communicate back with the tenant to troubleshoot or notify them, that should also be in writing – text or email. When you are gathering information and sending it to a vendor, make sure it’s clearly written and includes all details and photos that are applicable. Make sure you get an invoice or receipt for the completed work as well.

    Even if you communicate in person or over the phone, you should write down what was discussed and follow it up with a text or email to reiterate and clarify what was said. At Uplift Property Management, we keep very detailed notes of all communication and attach it to the tenant and work order so that nothing is mixed up or forgotten. These records will show that you took care of the maintenance request in the proper way and that you were never negligent and they might even serve as evidence if needed later on. 

    Ask Uplift!

    We can help you with maintenance requests. If you’re wondering how to handle maintenance requests that come in from tenants, please let us know. We would love to talk over these things with you and suggest some ways to streamline maintenance for your rental property. If you’d like to take advantage of a free rental analysis for your property, please click here. Of course, we offer lease only services where we can list, market, and show your unit. We also process applications and get a signed lease done. We also offer full property management service where we will handle all maintenance requests and coordinate all work needed for your San Diego rental property. Make sure you keep up your Landlord Education by following Uplift Property Management on Facebook, Instagram, or YouTube. 

  • Marketing Your Rental Unit

    Marketing Your Rental Unit
    When clicked, this video is loaded from YouTube servers. See our Privacy Policy for details.

    How to Market Your Rental Unit

    With so many rental units on the market, it’s hard to compete and make sure your unit gets the attention it deserves. Rental units are being advertised by property managers, real estate agents, owners, and even scammers. So the question is this, “How do I list and market my rental property so I can get qualified tenants to apply and lease with me?” While there’s no one solution that fixes all the potential problems you could run into, we want to share some tips for how to market your unit online and effectively. 

    1. Write a Detailed & Attractive Description

    You always want to make sure you have a good title for your listing. Start off your general description with information about bedrooms, bathrooms, utilities, lease terms, requirements to rent, and the availability date. Even if the website asks for some of this information, you want to make sure it makes it into the description as well since some people will only read the description. However, if the site gives you the option to put in specific information for your unit, do that as well. When you mention utilities, clearly outline what the tenant will be responsible for and what utilities will be included with the rent. Many renters want to know if they can sign a month-to-month agreement or if they have to sign a 12 month lease right away. Some renters even prefer longer lease terms. 

    Don’t forget to highlight all the amenities that the tenants will be able to enjoy. Common amenities might include garage parking, balconies, stainless steel appliances, tile floors, granite or quartz countertops, pools and spas, gym access, fenced yard, BBQ area, smart home features, extra storage, large windows, or a great view. This includes any HOA or common area amenities if applicable. 

    2. Take High Quality Photos

    For tenants, pictures can often either seal the deal or be a deal breaker. And listings with zero photos often don’t get any attention at all. Make sure you use your best camera, with the best lighting and widest angle possible. You can use a tripod to keep the angle consistent too. Get as far back into the corners of each room to show as much of your property as possible. This will give the tenants a good idea of what things will look like. Turn on lights everywhere you can. We use a DSLR camera with an attached flash for most of our photos. If all you have is your smartphone, those can sometimes have great results. Just make sure you zoom out as far as possible and get the best angles of your rooms. Watermarking your photos with your number might not be a bad idea either. 

    3. Give Instructions for Showings & Applications

    The main questions that tenants will ask are, “How can I view the property?” and “How do I apply?” Make sure both of those are clear on your listing so that there’s no confusion. If you use a self-showing lock box system like us, make sure the marketing link is in your description. If you only can do in-person showings, put available times and instructions for contacting you. Showing the unit can often be the most difficult part about leasing a property, so be ready for a lot of calls and no-shows. Because of this, we use a self-showing lock box system that allows tenants to create a profile and view the unit within minutes. When they create a profile, they take a picture of their photo ID, take a selfie, and put in credit card information for a $0.99 one time charge. This validates that they are who they say they are and allows them to access the unit with a code for 1 hour. 

    Applications can sometimes be tricky, but make sure you gather information in the same way each time. Using an online application makes it quick and easy for many tenants looking for homes these days. We have had many tenants see a home, view it using our self-showing lock box, and then apply all within an hour or two. Making it easy for them will also make it easy for you. 

    4. List Your Property on as Many Sites as Possible

    The more sites you can post your rental property on, the better. You might need to take a bit of time to post your vacancy on websites like Zillow, Trulia, HotPads, Apartments.com, Zumper and others. By having your unit on more sites, more prospective tenants will see them and potentially apply. With a couple clicks, we can list our rental properties on 40 different websites for prospective tenants to find. This makes it easy for us to list vacancies and update the listings when needed. 

    We also highly suggest posting vacancies to social media and sharing the information with local housing groups on Facebook. There are many housing groups in specific areas or cities that are dedicated to advertising or finding rental properties. One post on a facebook group could reach thousands of people. 

    5. Reduce the Price If There’s No Interest

    If you’re finding that no one is interested in your unit, it could easily be due to the price. Of course, there could be other reasons, but if your unit has attractive landscaping, looks clean inside and out, and matches the pictures and description you wrote, you’ll need to check the price. You might be above market rent. If a unit is priced higher than market value, there will often be zero action – not even requests for showings. If that’s the case, don’t be afraid to lower the rent a bit so that someone will move in sooner. You can always plan for a rent increase after the lease term is up. Sometimes it is actually more profitable for you to rent something out quickly at a lower price, rather than keeping the price high and waiting around for a desperate tenant. 

    Ask Uplift Property Management

    We can help you with your rental unit. If you’re wondering how you should list your rental property, please let us know. We would love to talk over these things with you and suggest some ways to get more interest in your rental property. If you’d like to take advantage of a free rental analysis for your property, please click here. Of course, we offer lease only services where we can list, market, and show your unit. We also process applications and get a signed lease done. We also offer full property management service where all this plus much more is included. Make sure you keep up your Landlord Education by following Uplift Property Management on Facebook, Instagram, or YouTube. 

  • Working with Vendors

    Working with Vendors
    When clicked, this video is loaded from YouTube servers. See our Privacy Policy for details.

    Working with Vendors

    If you manage your own rental property, you know what it’s like to deal with maintenance and vendors. Working with vendors can sometimes be a painful process and we want to help educate landlords and owners so that problems can be avoided. Our 6 suggestions below will help you develop better relationships, get better deals, and keep tenants longer. If you have questions about your specific situation or job, please reach out to us so we can help.

    1. Vendors Should Be Licensed & Insured

    If you’re managing your own rental, it will be very easy to think of maintenance more casually. Sometimes that works out and there aren’t issues. However, when issues do arise, all that work that you did personally or hired out to an unlicensed or uninsured vendor could end up being a big problem. If something goes wrong on the job, vendors that are licensed know how to handle it. Also, if they’re insured, they would be responsible for covering the cost as well. Accidents are never meant to happen, but they’re a fact of life. Vendors that are licensed and insured will also be more likely to keep records, give invoices, and provide warranties on parts and/or labor.

    It’s true that hiring a licensed and insured vendor will likely cost more money at the time of service, but the quality and safety of their work can save you hundreds or even thousands of dollars over the years. We work with many vendors in San Diego and are familiar with their services and pricing. If you are looking for a dependable licensed and insured vendor, please give us a call. 

    2. Establish Clear Expectations

    Make sure you tell the vendor exactly what the job will entail. If you or the vendor is vague in any way, the job could end up not being fully completed or the vendor could do much more than was expected. Even when directions are crystal clear, there can be mistakes made, so following up is usually a good idea. Try to avoid job descriptions like “fix the faucet” and “fix the AC”. Those descriptions can be interpreted in many ways depending on the vendor. 

    These expectations should also include the cost of the project. Some vendors will have a set price list that they can work from. If that’s the case, they should know fairly accurately what the job will end up costing. However, if they charge for time and materials, the cost could add up quickly. Even if the vendor can’t provide a solid bid for the job, they usually can give a rough estimate to give you an idea of what the costs will be. Make sure you give them a clear limit for approval and explain that they are only approved up to that limit. Explain to the vendor that if they go over the given limit and fail to obtain approval from you, you will only pay as much as the limit given. Vendors should always contact you for direction and approval before diving too deep into a project. 

    3. Keep a Written Record

    This point relates to almost all the others on this page. Make sure you communicate clearly. Often, that means you should use email or text to communicate job details with the vendor. You should also double check and make sure vendors receive all communication. Some vendors prefer email, while others prefer text. You don’t want to send an important email to a dormant address only to find out later that it was never received. If the vendor doesn’t use email or texting, try to write everything down on a physical paper somewhere and make a copy to keep for your records. As long as you can always point to a written record (email, text, paper) with details, you should be safe. Your written records should include job details, the cost, the maintenance limit, plans for payment, when the job is scheduled, and any guarantees or warranties they have. 

    Keep in mind, if you do talk with the vendor on the phone or in person, make sure you follow up that conversation with something in writing (an email or text) to confirm and solidify what was discussed. 

    4. For Big Projects, Get Bids

    If you have a big project coming up, it’s usually a good idea and time to gather a few bids and compare services and prices. Vendors will sometimes adjust their prices over time and for bigger projects, it’s a great time to re-evaluate prices. If you do end up getting bids, make sure you are comparing apples to apples. If you aren’t careful, you could find yourself comparing 1 vendor’s premium service with another vendor’s basic service. Some vendors will be very good about giving you options to repair or replace, while another vendor might only specialize in replacing and not repairs. 

    Make sure you also understand what is NOT included in the bid. When using a plumber, they can cut open your wall or ceiling and fix that leak, but their bid will not include repairing the wall after the work is done. Similarly, one painter might include paint in the bid, but another painter’s bid will come in cheaper, but will not include paint. Like in the 3rd suggestion, make sure you always, always have a bid or estimate in writing. 

    5. Inspect the Work After Completion

    You will want to check the work afterwards and confirm its completion before paying the vendor. Compare the work to the job description provided and check the functionality of everything. Just because something looks good, doesn’t mean it will work well. If you have a ceiling fan replaced by a handyman, make sure you test the fan at all speeds for longer periods to make sure it is properly balanced and doesn’t start to wobble.

    Make sure the lights work on it and the switch or remote are connected properly. When replacing a toilet, flush it multiple times, sit down on it and move around to ensure it won’t wobble, and check for leaks at the supply line and base. Ensure the work was done according to the expectations set and that you are 100% satisfied with the work. If there are any issues, you can talk with the vendor about fixing them before you pay. 

    6. Arrange for Quick Payment

    Make sure you can pay vendors the way they need and at the proper time. If you have found a good vendor, you need to treat them well or else they won’t do any jobs for you in the future. If you withhold payment longer than what was agreed, you could be burning bridges with them. Most licensed and insured vendors don’t deal in cash, so you will likely need to use a credit card or a personal check to pay. You also need to make sure you get an invoice or receipt for the work completed. This invoice should have the details about the job done and also information about any warranties or guarantees for the materials, parts, or labor. Keep this invoice or receipt for your records and make sure you can access it later if needed. 

    Ask Jensen Properties

    We work with vendors every day and have worked to build strong relationships with many of them. If you have questions about using vendors (especially in San Diego) at your property, please contact us and we will be happy to help. As a leading San Diego property manager, Jensen Properties works hard to educate all property owners. We are always available to assist you in your property management journey. If you are looking for a San Diego property management company, feel free to learn more about our Services & Pricing and contact us.  Make sure you keep up your Landlord Education by following Jensen Properties on Facebook, Instagram, or YouTube. 

  • Common Lease Violations and How to Prevent Them

    Common Lease Violations and How to Prevent Them

    It’s a good idea to get to know neighbors and build a relationship where they feel comfortable communicating issues around the property. Good tenants can act as a second set of eyes on your property and other tenants, alerting you on any lease violations they may see. Unfortunately, even the best of tenants are susceptible to committing lease violations. It may be difficult to deal with lease violations the first time around. Uplift Property Management has years of property management experience and systems in order to prevent and resolve any lease violations. We have put together a list of common lease violations you may experience. 

    Unauthorized Pets

    You’ll sometimes discover a tenant has brought a pet into your property without your knowledge. This could be because they were trying to avoid a pet deposit or perhaps they were unaware pets were not allowed. Sometimes when a property is advertised to ‘accept pets’, tenants assume they can add one at any time without prior approval or communication. Whether you find out via a neighbor, vendor, or just by sheer luck, it’s important to communicate with the tenant and address the lease violation. 

    Nevertheless, It’s important to be careful when speaking to a tenant about the unauthorized pet. Remember, service and emotional support animals are not considered pets! Both service and support animals are protected and cannot be considered unauthorized pets. It’s possible that they forgot to give you a letter from their doctor stating they require their animal.

    Unpaid Rent 

    More likely than not, you’ve had a tenant pay their rent late or maybe even refused to pay rent. For situations like this, an ounce of prevention is worth a pound of cure! The best way to safeguard against tenants who refuse to pay rent is to do a diligent job screening your applicants. Uplift Property Management has found that a thorough screening process should include  credit, income, rental, and criminal history check. You should also consider making paying rent easy by allowing your tenants to pay in person or online. Regardless, we always recommend you charge a late fee for delayed or unpaid rent. 

    Unauthorized Tenants

    Typically, an unauthorized tenant is someone that has been living in the property for an extended period of time such as 14 days or more within a 12 month period. Your lease should specify the differences between a resident and a guest. Generally, landlords require all persons over the age of 18 to submit an application and be financially responsible for the property. You should talk to your tenant if you discover signs of unauthorized tenants. Work on a plan for them to convert the prolonged guest into a tenant or, if outlined in your lease, fine them for the unauthorized tenant. 

    Resolving a Lease Violation

    Most landlords like to give their tenants a warning when they violate their lease. If the warning gets ignored or you deem the violation warrants more than a warning, you can issue them a 3-day notice. A 3-day Notice to Cure Breach or Perform informs the tenant that they have three days from the day the notice is served to fix the violation. It gives them the option to either comply or vacate the property. If they refuse to resolve the issue, the next step in the eviction process would be filing an Unlawful Detainer. 

    Let Us Help You

    Uplift Property Management has plenty of experience resolving lease violations amicably. Call us or send us a message so we can help you in resolving any issues you are running into. We will provide a free rental analysis and come to you in person when you’re available. 

    Explore our website to see the many ways we can turn your real estate dreams into a reality.

  • No Hidden Fees: Every Uplift Fee, Listed Up Front

    No Hidden Fees: Every Uplift Fee, Listed Up Front
    When clicked, this video is loaded from YouTube servers. See our Privacy Policy for details.

    Uplift Property Management charges a monthly management fee that is a percentage of rent collected: 8% for single-family homes ($175 minimum per unit) and 6% for 5–15 unit buildings ($125 minimum per unit). The only other fees are a tenant placement fee when a new tenant signs and an annual tenant retention fee at renewal, all listed on our Services & Pricing page before you sign. When we collect rent, the management fee is deducted, invoices are paid, and the remainder is sent to you by the 10th of each month.

    If you are comparing San Diego property managers, ask each one for a complete written fee schedule. Here are the most common fees to ask about, and how Uplift handles each one.

    Leasing Fee or Tenant Placement Fee

    This fee is charged each time the management company signs a lease with a new tenant, and it covers marketing, showings, screening, and lease preparation. At Uplift Property Management, the tenant placement fee is $595 per new tenant for single-family homes and $395 for multifamily (5–15 units). Leasing-only service is one month’s rent.

    Lease Renewal Fee

    Some managers charge a fee when a tenant renews or when rent is adjusted at renewal. Ask whether a renewal fee applies and how much it is. At Uplift Property Management, the annual tenant retention fee is $195 for single-family homes and $99 for multifamily.

    Onboarding Fee

    Onboarding a new property involves gathering owner and tenant information, inspecting the property, getting it rent-ready, and collecting records from a previous manager. Some companies charge a separate fee for this work. Uplift Property Management does not charge an onboarding fee.

    Maintenance Coordination Fee or Project Management Fee

    Some property management companies charge a percentage of the project cost for coordinating large maintenance projects, turns, or insurance claims. For example, a 10% fee on a $5,000 remodel between tenants would add $500. Uplift Property Management does not charge maintenance coordination or project management fees, and does not mark up vendor invoices.

    Eviction Management Fee

    Some companies charge an extra fee to manage an eviction. Uplift works to avoid evictions through its Eviction Avoidance Process, which starts with negotiating with the tenant. If an eviction is still needed, Uplift manages it and does not charge an eviction management fee. Legal costs are charged to the tenant, although tenants often do not pay them in full. For tenants Uplift placed, the Eviction Free Guarantee covers up to $2,000 of attorney fees on rents of $2,500 or more.

    Early Termination Fee

    Some property managers charge a fee if you cancel your contract. Uplift’s property management agreement is written for one year, then continues month-to-month. If you cancel within the first year, the remainder of the first year’s management fees is due. After the first year, you can cancel at any time without a fee.

  • COVID-19 Owner/Landlord Information

    COVID-19 Owner/Landlord Information

    COVID-19 for Landlords and Owners in California

    Date: May 18, 2020

    Whether you are one of our clients or not, we want to help you understand what is going on for tenants, landlords, and property managers during this COVID-19 pandemic. There will be more updates with time, but we wanted to inform you of the current situation in California (see disclaimer at the bottom of this page).

    The videos below detail some information that we currently have regarding California state legislation and San Diego (city and county) legislation.

    Please also refer to the following documents for more information:

    COVID-19 Temporary Eviction Ban – FAQs

    California Executive Order from Gov. Newsom


    MID MAY 2020 UPDATE
    for
    CALIFORNIA & SAN DIEGO


    When clicked, this video is loaded from YouTube servers. See our Privacy Policy for details.

    Older Updates…

    CALIFORNIA STATE

    When clicked, this video is loaded from YouTube servers. See our Privacy Policy for details.

    SAN DIEGO CITY AND COUNTY


    When clicked, this video is loaded from YouTube servers. See our Privacy Policy for details.

    * DISCLAIMER: Information about COVID-19 is changing every day, so this information is current as of the date of posting. However, we are also not a legal firm or lawyers, so this information is only provided as our interpretation of the current laws and should not be used as firm legal advice. Please contact us directly for more information or consult a lawyer for your exact situation.

  • What Makes Us Different: We Answer the Phones

    What Makes Us Different: We Answer the Phones
    When clicked, this video is loaded from YouTube servers. See our Privacy Policy for details.

    Many San Diego property managers seem to be away from the office when you need them the most. At Uplift Property Management, we pride ourselves on being a reliable San Diego property management company that strives to always be available to answer your phone calls. Our office will take your call and assist in answering your questions or resolving any issues you may have. We’re also backed by an incredible team who’s happy to step in and help when needed. 

    Sometimes, life comes at us fast and issues require immediate attention. We’ve created an emergency phone line for situations like this, working with our trusted vendors to make sure we can send out emergency plumbing overnight and outside of typical office hours to keep your home safe. Experiencing a major plumbing leak? Tenants can call our emergency phone line and get help immediately. 

    Communication is important to us. It’s a key factor in building amazing relationships with both tenants and property owners. Not only are we actively answering phones, but also pride ourselves in our response time via social media, text and emails, too! We offer a variety of communication avenues to best suit everyone’s needs. 

    At Uplift Property Management we specialize in San Diego property management for all types of owners and investors. Explore our website and blogs to see the many ways Uplift Property Management can make your real estate dreams a reality!

  • Raising Rent 101

    Raising Rent 101

    Raising your tenant’s rent can be one of the most stressful and tense interactions you’ll share. Keeping a good tenant is incredibly valuable, but you’ll also want to maximize your earnings and profit on your property. This difficult situation causes landlords to be afraid of raising their rent because they don’t want good tenants to leave. Uplift Property Management has years of experience in lease negotiations and renewals. We’ve developed a system to keep owners and tenants happy throughout their tenancy. Here are a few tips we recommend to make raising your rent a much easier task. 

    Right Time and Right Amount 

    A common mistake landlords make when raising the rent is to lack consistency in their rent increases. Inconsistency can cause your property to fall below market price, which then leads to monetary loss over the long run. If you then try to make up for the lost money by raising the rent several hundred dollars, you’ll find your tenants extremely unhappy and at risk of moving out. 

    The correct time to raise rent is at the end of a lease and the start of a lease renewal, which is usually every 12-months. Tenants should then expect to receive a rent increase every year, at the end of their lease. The rising cost of living and inflation are a fairly easy way to justify a rent increase every year. 

    Follow your local laws regarding rent control and work within the law. Just because you can raise the rent, doesn’t mean you should. A higher rent increase can lead to more move outs. You should also consider the tenant’s options. If the rent increase puts your property at the same price as a newer property, your tenants will be incentivized to leave you for the newer property where they will pay the same amount but possibly receive a home with fresh paint and new appliances. Keep It Friendly

    You don’t need to know everything about your tenant, but maintaining a good relationship with them can make rent increases easier. Communication is important. Make sure you’re answering all their questions and concerns in a timely manner so they don’t feel neglected or ignored. Don’t let repairs sit for too long if they need to be completed. If a tenant likes you and the way things are running then there will be no reason for them to leave. 

    Tenants will feel more important if you can remember a few key things about them. Ask about their hobbies, family, recent events. Remembering small details shows you’re paying attention and see them as a person, not just a tenant. 

    Negotiations 

    You should try to keep up with the rental market but it’s just as important to listen to and be reasonable with your tenants. As an example, if you increase rent by $60 and your tenant is unhappy with it, you may be able to keep your tenant by negotiating. If your tenant says they will sign another year but they’d like their carpets cleaned, it may be worth the expense. A one-time expense of $80 for carpet cleaning will be worth it in the long run. $60 for 12 months will gain you an extra $720 a year. 

    Alternatively, if you increase rent by $60 and your tenant makes a counteroffer to increase rent by only $45 dollars, it may be worth it to take the deal instead of having them move out. You would only be losing out on $180 then and it’s important to remember that move outs can be very expensive. Typically, a standard turnover costs about $3,000. 

    Let Them Think About It

    It’s most beneficial to let tenants know about a rent increase sooner rather than later. Giving them a notice 60 days before their lease expires gives them time to decide what they want to do. This may result in them negotiating with you. Nevertheless, you should ask for a final answer from them 30 days before the end of lease. 

    How Uplift Property Management Can Help

    Rent increases can be stressful… But they don’t have to be! We evaluate rent prices annually and consistently work to increase the return on your investment. Explore our website and find out for yourself how Uplift Property Management can make your real estate dreams a reality.

  • The Need-to-Know for Service Animals & Emotional Support Animals

    The Need-to-Know for Service Animals & Emotional Support Animals

    More and more, often applicants who are applying for rentals are informing us that they have an emotional support animal, service animal or an assistance animal. According to the laws of California they are not considered pets. They are basically considered medical equipment. Support or assistance animals are on duty and providing assistance to people with disabilities. 

    Uplift Property Management is well-versed in situations regarding assistance animals, fair housing and California laws. Here’s the Need-to-Know regarding assistance and emotional support animals.

    Emotional Support vs. Service Animals 

    Although the two are not the same, they are both protected by housing laws. However, there are important differences to remember. Emotional support animals provide support for those that suffer from anxiety, depression, post-traumatic stress disorder, etc. They are therapeutic animals and usually a cat or dog. 

    A service animal is typically a dog, trained to assist a person. Wheelchair-bound individuals, people with blindness, or people prone to seizures are typically recommended a service animal for assistance. You can usually identify a service animal by their vest, labeled “service animal” or something similar. 

    Although service animals are allowed entry anywhere that their owners are, emotional support animals have more restrictions.

    Housing Laws and Support Animals 

    Remember, emotional support animals and service animals are not considered pets. Because of this, you are not allowed to charge a pet rent or even ask for an added pet deposit. You must allow for service animals and support animals in your property, even if you don’t want pets in your home. Furthermore, you cannot discriminate against specific breeds.

    You may be doing a walkthrough inspection and find an animal at your property even though you were never informed. The tenants may then tell you it’s an emotional support animal. According to California law, tenants are not required to tell you if they need a support animal. However, you can request a verification letter at any time from a qualified professional.

    Verifying the Service Animal

    If a tenant says they have a service or emotional support animal but there is not an obvious disability, you may ask for written verification. Written verification is usually a simple letter or prescription that states the person in question is required to have a service animal. If the disability is visibly apparent, there is no need for service animal verification. You should not ask the tenant what their disability is in this situation. 

    Common Misconceptions

    We’ve compiled the most frequently asked questions regarding service animals.

    Do service/support animals have to be formally trained?

    No, the service/support animal does not need to be formally trained. Although most service animals are trained and need to be registered/certified as a assistance animal, there is no need to confirm this with each individual animal. On the other hand, emotional support animals do not require any training.

    Can you contact the source of the letter or prescription?

    No, you cannot contact the tenant’s verification source directly. This violates HIPAA privacy laws and fair housing laws. You must accept the letter from their therapist as it is provided to you. 

    Can you ask for proof of disability?

    No, you may not ask the tenant about their supposed disability or why they need a support/service animal. Their provided verification letter will be their reason. If the letter does not seem legitimate, you may ask the tenant to complete a reasonable accommodation form. 

    Can you deny an application because they have an service/support animal?

    No, you may not turn away an applicant with a service/support animal that falls under your restricted breeds. This is because a service/support animal is not considered a pet. The restricted breeds do not apply to them. If you feel the animal would harm those around it, you may deny them but it is strongly advised you do not. 

    Tired of dealing with all the laws surrounding housing? Uplift Property Management has the experience to make your property thrive. Contact us today to see how our property management solutions can remove stress from your life while taking care of your investments.